iPhone 6s Plus Battery Replacement
Go to step 1Use this guide to bring life back to your iPhone 6s Plus with a new battery. If your battery is swollen, take appropriate precautions.
This guide instructs you to detach the front panel assembly; this is intended to prevent damage to the display cables. If you feel comfortable supporting the display carefully while peeling the battery out of the iPhone, you can skip the display removal and go directly to the battery removal steps.
This guide also instructs you to remove the Taptic Engine. This procedure is optional but recommended to assist removing the battery's adhesive.
For optimal performance, after completing this guide, calibrate your newly installed battery: Charge it to 100% and keep charging it for at least two more hours. Then use your iPhone until it shuts off due to low battery. Finally, charge it uninterrupted to 100%.
You can also use this guide to replace the battery connector bracket.
For wholesale purchases,please contact WhatsApp:+86-18923771260 email: fengbowei3318@163.com
-
-
Power off your iPhone before beginning disassembly.
-
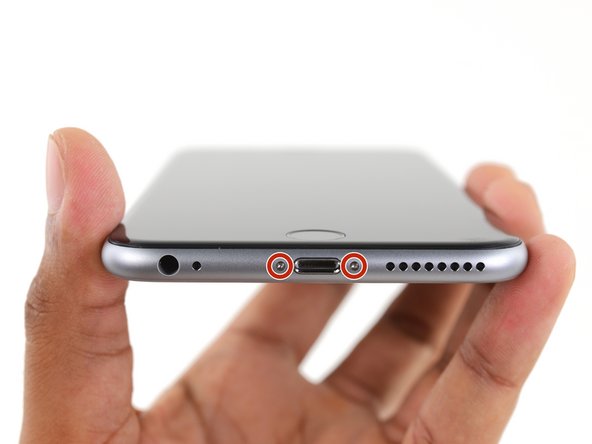
Remove the two 3.4 mm Pentalobe screws on either side of the Lightning port.
-
-
-
If you don't have an Anti-Clamp, follow the next three steps to use a suction handle.
-
Apply mild heat to the lower edge of the iPhone using an iOpener or hair dryer for about a minute.
-
-
-
Pull up on the suction cup with firm, constant pressure to create a slight gap between the front panel and rear case.
-
-
-
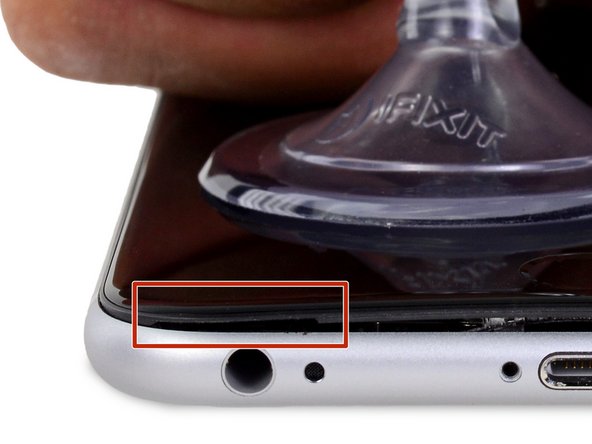
The safest place to pry from is the notch in the front panel above the headphone jack.
-
While still maintaining pressure on the suction cup, insert the flat tip of a spudger into the gap, directly above the headphone jack.
-
-
-
While firmly pulling up on the suction cup, slide the edge of the spudger under the bottom left corner of the display.
-
-
-
Slide the tip of the spudger up the left side of the phone, between the front panel and the rear case.
-
-
-
Insert the flat tip of the spudger under the right edge of the display.
-
Slide the spudger up the right side.
-
-
-
-
Use a plastic opening tool to hold down the rear case while pulling up the suction cup to open the phone.
-
-
-
Gently grasp the display assembly and lift it up to open the phone, using the clips at the top of the front panel as a hinge.
-
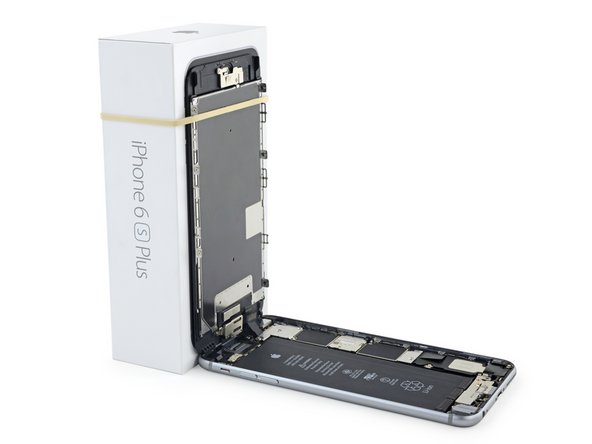
Open the display to about a 90º angle, and lean it against something to keep it propped up while you're working on the phone.
-
Add a rubber band to keep the display securely in place while you work. This prevents undue strain on the display cables.
-
-
-
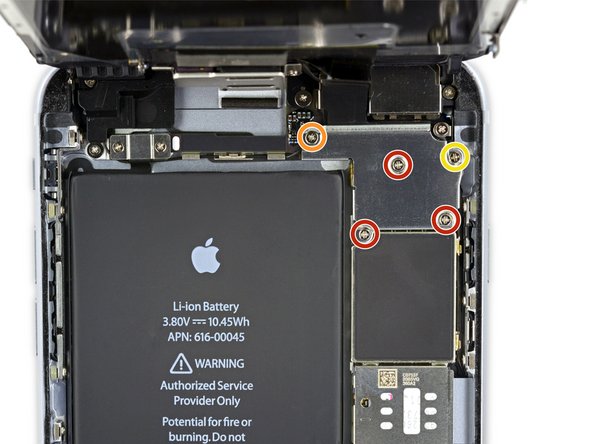
Remove two Phillips screws securing the battery connector bracket to the logic board, of the following lengths:
-
One 2.9 mm screw
-
One 2.3 mm screw
-
-
-
Use a spudger or a clean fingernail to disconnect the battery connector by prying it straight up off the logic board.
-
-
-
Bend the connector back to ensure it doesn't make contact and power the iPhone on while you're working on it.
-
-
-
Remove the following Phillips screws:
-
Three 1.3 mm screws
-
One 1.6 mm screw
-
One 3.0 mm screw
-
-
-
Use a plastic opening tool to disconnect the front-facing camera and sensor cable connector.
-
-
-
Use a plastic opening tool to disconnect the digitizer cable by prying it straight up from its socket on the logic board.
-
-
-
Disconnect the home button/fingerprint sensor cable by prying it straight up from its socket on the logic board.
-
-
-
Remove the following Phillips screws over the Taptic Engine cable bracket:
-
Two 3.5 mm screws
-
One 2.7 mm screw
-
-
-
Disconnect the Taptic Engine's flex cable from the socket on the Lightning Connector flex cable.
-
-
-
Use tweezers, or your fingers, to peel up the black pull tab on one of the adhesive strips.
-
-
-
Pull the strip out slowly and steadily at a low angle. Give it plenty of time to stretch and un-stick from under the battery.
-
Repeat the process for the remaining stretch release adhesive strips.
-
-
-
If you're still having trouble removing the battery, apply a few drops of high concentration (90% or higher) isopropyl alcohol under the edge of the battery in the area of the broken adhesive strip(s).
-
Tilt the phone up so the isopropyl alcohol can flow toward the adhesive strip.
-
Hold for 1–2 minutes to allow the isopropyl alcohol to weaken the adhesive.
-
Use an opening pick or the flat end of a spudger to slowly pry up the battery.
-
-
-
Remove the battery.
-
Adhere the battery, disconnect it, and continue reassembling your device.
-


